Okay, before I even get started, there are a few things you need. You will need at least 3 icons. (Please note, I'm not giving the icons I used away, I'm just using them for the tutorial. :P)
~~Set Up / Before you begin the mapping:
~The first icon is a water icon. You will need 1 or 2 variations, depending on the amount of detail you want to put into your waterfall. I used 2 in this tutorial; A still water, that slowly moves back and forth, and a rapid water flowing very fast downwards. This will give the appearance of an actual waterfall once you get to the mapping part.
~The next icon you will need is a cliff icon. This can be very basic, again it just depends on how much detail you want your waterfall setup to have. Since this is a basic tutorial, I wont make anything special for the cliff, just a 32x32 rock tile.
~Next, you will need a ground icon...such as sand or grass. I used both sand and grass. That means I used a total of 6 main icons. I used two or three icons for extra details, but that's way down the road. So now, once you have those three icons, we can move on.
~~Step One:
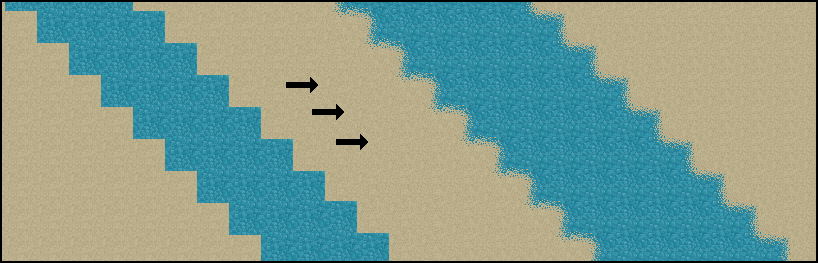
Okay, I intended on making this tutorial assuming you already know how to make an icon and place it on the map, so I won't dive into the actual coding part, since this is just a waterfall tutorial. XD Let's assume you already have your water and ground icon (I will be using sand) placed on the map. The first thing you need to do, is to eliminate the boxy-feel...or in other words...get rid of the grid. This can be done with even the slightest iconning skill, or even DM skill in general. It's very simple to do, and adds to the overall effect of the image. Just look:
~~Step Two:
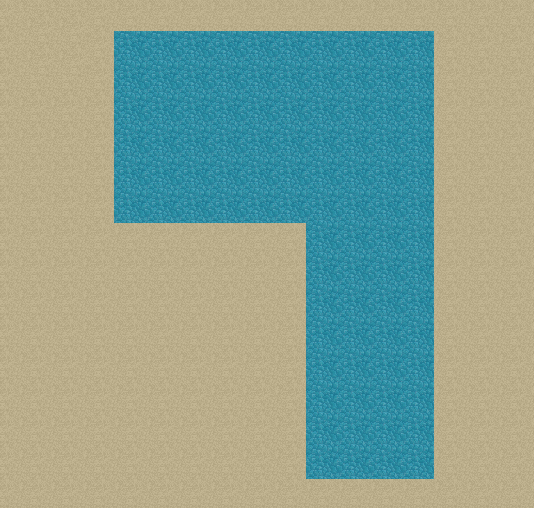
Okay, once you are able to handle making it seem less grid-like, we can move onto the waterfall shape it's-self. I like to start with a backwards P shape. The top part of the "P" is going to be the higher water, and the line going down will eventually be our falling water. Here is an example of what I mean by backwards "P".
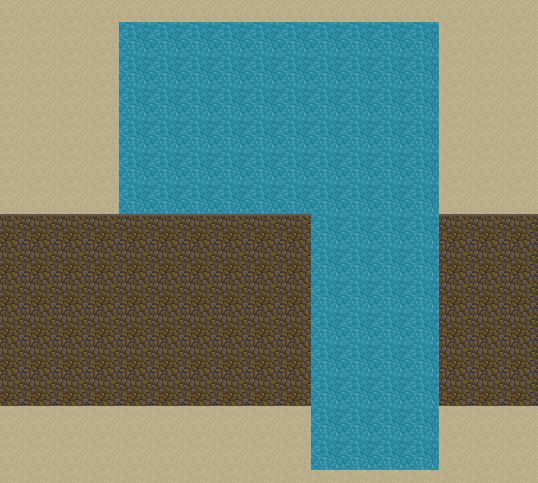
Okay, that's not very hard, so I won't call just making the shape one step. The next part of this step, is creating your cliff. My "cliff" icon doesn't look very much like a cliff, but hopefully by the end of this tutorial I will have made it appear to give different elevations to my ground icon. Here is my example of a basic cliff:
~~Step Three:
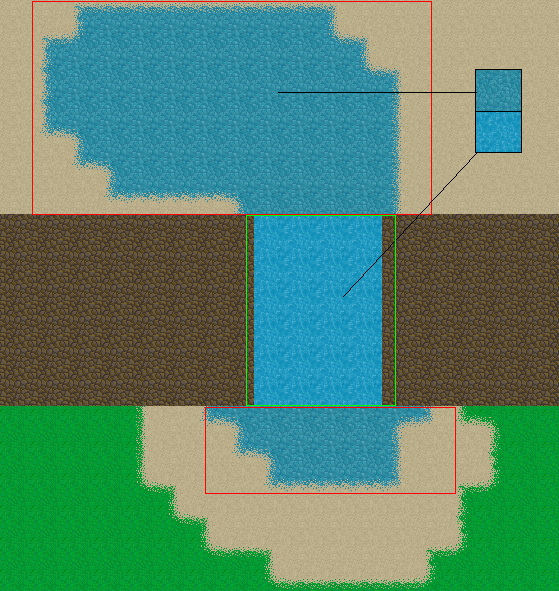
Now that you have your base waterfall modeled out, we can move on. Now think about it, if the water is running off a cliff and down to the ground, it would make a puddle/pond/lake...right? So go ahead and make a few adjustments. I used the boxes to mark off where my water changes will take place, I will explain in a second.
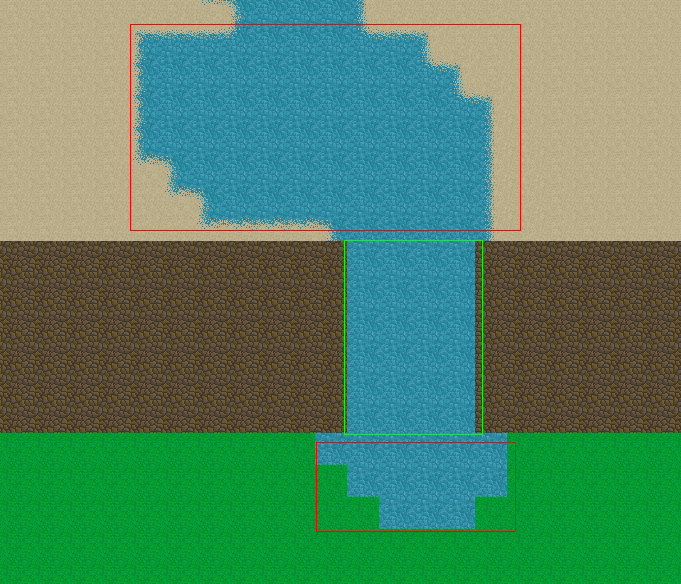
The waterfall wouldn't look at all like a waterfall if it didn't have rushing water, right? Oh course it wouldn't, so get that rushing water icon you made at the beginning, and replace the water covering the cliff with your rushing water. It should already be looking like a waterfall at the end of this step! (Note: Inside of the red boxes is my still, calm water icon. Inside of the green, is my rushing water. ^^)
~~Step Four:
Now that you have a recognizable waterfall, you can tweak and do whatever you want to have fun with it!
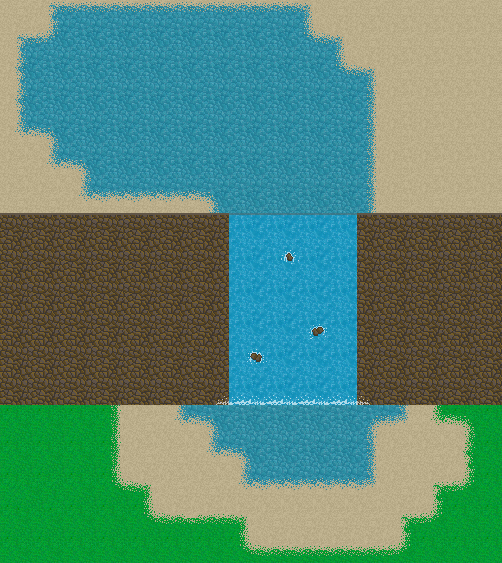
I added a misty-foam type thing at the bottom of my waterfall, and I also added a brown-ish edge on the top, so it looks like the water is rolling over an edge. Then I took my rock turf and edited out 1 or 2 rocks and placed them randomly in the middle of the down-coming water. Sorry that I couldn't get an animated picture, but because the still water and running water are two different speeds, I had a REALLY hard time GIF-i-fying it in photoshop. I promise you that the animation is smooth. ^^. Also, if you want more realistic looking cliffs, I would suggest going here:
http://www.byond.com/members/PixelArt/forum?id=663
That's a very good example of detailed elevation. Thanks for reading!